
 Ok, Coffee can be one of them, but may be after the 3rd mug of the day, you will ask the question, “so, what are the productivity secrets of Excel 2007?”.
That, my friend, is the reason why you should put aside the mug and read this post carefully. The post is pure filtered decoction of tips you must sip.
if you like this post (or for that matter if you like coffee) please add it to your delicious bookmarks or stumble it or tweet it.
Thanks, You are beautiful.
Turn on the Clipboard pane, Copy paste like there is no tomorrow

We all swear by ctrl+c, ctrl+v. A large part of my MBA case studies were submitted intime thanks only to the awesome clipboard. But do you know that you can turn on the clipboard feature in Excel 2007 in a full panel view and use it to speed up the copy paste activity.
Hold Down ALT to see what keyboard shortcuts are available, press key and you will see more

All you have to do is hold the ALT key down. And I can bet that you will learn a fun and simple keyboard shortcut for something that you use everyday. What more, in Excel 2007 you can use most of the Excel 2003 (and earlier) keyboard shortcuts.
Lock a feature to Boost up your performance, for eg. lock format painter and paste formats everywhere

When you need to perform certain action several times, like for eg. if you want to paste the same formatting over 40 different cells, you can lock the format painter by double clicking on it. See the screencast to understand how it works.
(When you can inserting shapes etc, you can use “lock drawing mode” option from right click menu)
Make your charts and tables go everywhere, copy them as pictures

When you copy a chart / table of cells as picture, they take less space and look lot better when pasted.
Add Invisible / Hidden features to your Quick Access Toolbar

You can add hidden features of excel 2007 like camera tool etc. to the quick access toolbar (the tools that you usually see next to office button). Just click on the office button > Excel options > Customize and select “commands not in the ribbon”. These are the features that are not usually shown on ribbon (some of them are shown when you lets say select a chart or table or something like that).
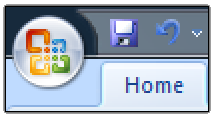
Move the Quick Access Toolbar down to save mouse travel time

I think that title says it all. See the image.
Always save the files in Excel 2003-97 compatible mode

Very useful if your colleagues / clients are still using old versions. Just go to Office button > Excel Options > Save and change the file type to Excel 2003-97.
Click on the corner of a group of Ribbon Icons to launch its UI

This is not applicable for all groups. But for some groups of icons you see a little squarish icon on the bottom right corner. Just hit it to launch a friendly office 2003ish looking dialog to make changes to the settings etc.
Add chart related options to Quick Access Toolbar to save time

If you make a lot of charts, then it pays to add the chart related options like “adding error bars”, “adding axis” etc. to the quick access toolbar. Then you can press ALT+number to activate this feature and work with it without even moving your mouse.
Create a named range quickly by typing the name in the corner of formula bar

You can quickly create a named range by selecting a bunch of cells and typing the name in the formula bar’s left hand corner where usually cell address’ is displayed.
See the screencast.
BONUS: Enable Developer Ribbon Toolbar in Excel 2007

If you in to mochas and trying to explore macros, then this one is for you. Enable the Developer toolbar from Excel options > Popular and you can play with all those form controls and macros.
More Tips and Tricks on using Microsoft Excel
Did you enjoy the post? Do you want more ? Well, it is not coffee, so you can consume as much as you want. Start with these and see where your mouse takes you.
Excel Productivity – Advanced Tips & Tricks
Excel can be Exciting – 15 hacks you don’t know
100 Excel Tips, Tricks and Resources
Sign up today and recieve an E-book with 95 Excel & Charting Tips


42 Responses to “Do you know these Excel 2007 Productivity Secrets (Hint: Coffee is not one of them)”
The 'creating named range' trick works in Excel 2003 as well FWIW.
@Worm... Agree, for that matter the tips "locking a tool for repeated action" and "turing on clipboard pane" work in earlier versions although they look at feel a bit different.
Thanks for the Developer's Ribbon mention! Can't believe I overlooked this one - I went the tedious route of enabling particular forms through the quick access toolbar.
[...] posts that show features of a product that I use frequently that I didn’t know existed. Excel@Work has a great blog post “Do you know these Excel 2007 Productivity Secrets (Hint: Coffee is not one [...]
"Always save the files in Excel 2003-97 compatible mode"
we are finding that Excel is changing some formulas to #N/A when the file is saved in Excel 97-2003 format. We think it may have to do with some ATP functions, which are native to Excel 2007 (but require the Analysis ToolPak to be enabled in Excel 2003).
@Adam.. you are welcome...
@Harry : did you say #N/A, because when I tried to open sheet with analysis toolpak formulas in a version of excel without them, it usually shows #name error and corrects the formulas when I install the add-ins.
Thanks for the tips Chandoo!
By the way, I always wondered.. which tool do you use to make your different screencast or animated gif?
Is it Jing or kind of?
http://www.jingproject.com/
[...] Do you know these Excel 2007 Productivity Secrets (Hint: Coffee is not one of them) - More help with how to do things in Excel 2007. So THAT’S what those little boxes do… [...]
[...] Try clicking on these: excel keyboard shortcuts, excel mouse tips & tricks, excel productivity tips part 1 & part 2 [...]
[...] Related: Excel productivity secrets - part 1 & part 2 [...]
The best productivity tip for XL2007 is to re-install XL2K or XL03...
(I wish I was only kidding)
Aloha,
I am looking for the zip file you mentioned on this link. Many thanks.
http://windowssecrets.com/forums/showthread.php/63874-create-a-math-practice-table-(excel-2003)
@dcardno: I swear by Excel 2007. Okay, I swear AT it too...but less than I used to swear at its predecessors. Have been using it for 18 months. Pivottables in 2007 are certainly worth the price of admission alone. Hopefully the next version will address usability issues (like the fact that the old dialog boxes that still lurk beneath the new interface often have rediculously small input boxes). But now, when I'm faced with earlier versions, I struggle.
Although untill recently I used to crash it quite a bit. Not so bad now, don't know why.
What kinds of issues are you facing?
I developed a custom toolbar in 2003 excel version. But since I upgraded to excel 2007 I cannot turn on the custom toolbar. The macros that were enabled on the toolbar are available in excel.
Hello..Chandoo. . . I am New Hear & I have a problem with excel-07, I have serial No from 123 to 500 in row but qty=425, so i want to knw how many & which No- not in my series??
[...] First add a scroll-bar form control to your excel sheet. To do this go to Developer Ribbon > Insert > Scroll-bar Form Control in Excel 2007. In Excel 2003 use View > Toolbars > Forms and select Scroll-bar control. (related: enable developer toolbar in excel 2007) [...]
[...] Tips and Blogs… Check them out: http://chandoo.org http://excel2007.tips.net http://spreadsheets.about.com [...]
very nice tricks...really helping lot..thank you so much Chandoo....
[...] Since our data has 3 series (sales, profits and number of customers), we will take 3 check boxes and place them somewhere on our worksheet. Insert check boxes from developer ribbon / forms tool bar (tip: show developer ribbon in excel 2007) [...]
nice tricks
[...] PS: If you do not have developer tab, learn how to enable it. [...]
[...] PS: If you do not have developer tab, learn how to enable it. [...]
Hi Chandoo,
How do u make a row-wise report when your data is cast column wise?
Typical example is a pay roll.
Where the employee name, his revenues, their totals, his deductions, their totals and nett pay is cast column wise. But you need his payslip in a row wise format. It would be appreciated if I get a reply in the email id provided.
Have a nice day.
@Pradeep
Your values in the report are just individual queries from your data table
Each one can be customised based on some criteria that suits your purpose
the location of them is arbitary
.
eg: You will type in a name or Employee Number and maybe a Pay No and it will retrieve all your data and place where ever you want. But each piece of data is an individual query from your source data.
@Pradeep,
I had a similar situation. Making it simple, I used Paste special, values, Transpose option, coupled with a little formatting.
If you wish in detailed, I can send you the work sheet.
Sir, I'm say Thank you, very much....!!!
[...] Do you know these Excel Productivity Secrets? [...]
Hello Chandoo and everyone!
Chandoo excellent tips!!!!!
thanks...
can u help me out ???
i m working in a sheet in which i m using data validation (indirect method)
in which when i select a value from cell A1 (Drop Down Menu) the values in Cell B1 (which is also a drop down menu) changes according to A1. this is done through creating a named range....
now !! What I need is, i want a two-word Name of the ranges.....
is that possible !!!!!
if yes then please let me know...
thanks for ur support !!!!!
Kind Regards!!!!!
Abdullah
I have followed all the above steps correctly but it does not work. Why could this be?
It is quite hard to find the developer ribbon in Excel 2007/2010. Here is an description on how to find it: http://www.lazerwire.com/2011/11/excel-vba-display-developer-toolbar-or.html
[...] Excel 2007 Productivity Tips & Secrets [...]
Here are some of the best useful tips one can ever look for in Excel. gives a lot of convenience
Loved the information about the ribbon. Thanks
Kathleen Sparke
Dear Chandoo,
I appreciated your tips on saving charts or tables as picture files that can be used at other times. I also appreciated knowing that I can add hidden features to the ribbon, and that I can create a name range quickly by adding it to the formula bar. Thanks,
Kathleen Sparke
very helpful hope i get to work with some of these in the future thanx for the info
These are great tips for all! Just wondering if you have a blog that addresses using excel with the keyboard only. I mean even working with charts and there elements. I would really appreciate an resource like that. It would emensely help a larger community.
@Blind Seeker
Start with
http://chandoo.org/wp/2010/02/22/complete-list-of-excel-shortcuts/
http://chandoo.org/wp/2010/02/03/excel-keyboard-shortcuts-2/
then
http://chandoo.org/wp/tag/keyboard-shortcuts/
Hi,
As was trying in excel to do the total amount which is in figure (numeric) to convert into words. (Rupees Ten Thousand Three hundred and Fifty Four Only or Rupees Ten Thousand Three hundred and Fifty Four Only).
And if we enter 01 in a cell it take only 1. 01 will not appear.
Please let me know how to do both the things?
Write solution for it & send to my email Id mhk_mysore@yahoo.in
Thanks & Regards,
Hemanth
want to know if i have 1000 data & chose to between them like 1-15, 50-55 and 100-150 how to filter this data
Fantastic information about the ribbon. Thanks
[…] Enabling Developer Toolbar & Form controls in Excel […]
Seems pretty simple in retrospect but I wasted a lot of time changing the formatting of my charts--axes, bar or line colors/marker-styles, font sizes/styles etc...
When I finally figured out that after formatting it once I could save it as a template to use as the basis for future charts (and just "Select Data" the new data), I was thrilled.