Power BI is a data analytics & visualization software. It is one of the most popular and powerful way to work with complex business data. In this page, you will find a comprehensive guide to start your Power BI journey.
Getting Started with Power BI – Table of contents
- What is Power BI?
- Who should use Power BI?
- How to get it?
- Building your first report with Power BI – Tutorial
- Understanding Power BI Desktop UI
- Loading the sample data
- Adding visuals
- Changing calculations
- Understanding interactions
- Putting it all together – Making a sample report
- Saving & Publishing your report
- Updating / Refreshing the report
- When to use each of the Power BI visualizations?
- Video tutorial – Introduction to Power BI
- Downloads – Sample data, completed report
- Glossary of terms
- Power Query
- Power Pivot
- DAX
- M Language
- Data model
- Relationships
- Measures
- Interactions
- Filters, Slicers
- Refresh
- Resources to learn Power BI
- Websites
- Books
- Video Channels
- Online Courses
- Latest on Power BI, PQ and PP from Chandoo
- Closing Remarks on Power BI
What is Power BI?
Power BI is a software to create & publish reports and data stories from your data-sets. You can make highly interactive, engaging and powerful reports, dashboards or visuals with Power BI. You can connect to any data (Excel files, SQL databases, BI warehouses, Cloud data, APIs, web pages and more), mashup the data, link one table with others, create clickable visualizations and then share them with your audience securely thru Power BI.


Who should use Power BI?
If your job / business or life depends on data, then you can use Power BI. There are two kinds of users for Power BI – Creators & Consumers.
Creators are people who make stuff in Power BI.
Consumers are people who read / view things built in Power BI.
Power BI Creators are typically:
- Reporting professionals
- Analysts
- BI Developers
- Visualization Specialists
- Story tellers / Presenters
On the other-hand, almost anyone can be a Power BI consumer.
How is Power BI different from Excel?
So what, even Excel can create interactive reports. But there are several crucial differences between Power BI and Excel.
- Power BI allows rich, immersive and interactive experiences out-of-box. You can click on a bar in bar chart & other visuals respond to the event and highlight or filter relevant data. You can show graphs & visuals that are very tricky (or impossible) to reproduce in Excel like maps, pictures and custom visuals.
- Power BI works with large data sets There is no artificial limit of 1mn rows in Power BI. You can hookup to a business data set and analyze any volume of data. The limit depends on what your computer (or Power BI server) can process.
- Share and read reports easily You can create reports in Power BI and share them in formats that are universal (i.e. browser pages or apps). This means, your boss need not have Excel or Power BI installed to enjoy the beautiful reports you create.
- Power BI is for story telling while Excel is for almost anything. We can use Excel to simulate pendulum motion, calculate Venus orbit, model a start-up business plan or many other things. Power BI is mainly for data analysis & story telling. If you try to replicate a large, intricate financial model or optimization problem with Power BI, you will either fail or suffer miserably. On the other-hand, if you use Power BI for making reports, running cool analysis algorithms (clustering, outlier detection, geo-spatial patterns etc.) you will wow your colleagues and bosses.
How to get Power BI Software?
Power BI Desktop software is free to download. Just head to Microsoft Power BI website and download the version for your computer.
Things to keep in mind when downloading and installing Power BI:
- Power BI is always changing. Almost every month, Microsoft releases a new version of the software. One simple way to stay on top is to install Power BI thru Microsoft Store (on Windows 10). This way, your computer will automatically update the software whenever there is a new version.
- You do not need PowerBI.com account to use Power BI Desktop. While Power BI may prompt you to login, you can use the software without registering for the online account. However, you can sign up for free PowerBI.com account.
- Login to publish & share your work. Although you can use PowerBI without logging in, you must log-in if you want to publish or share your reports with others.
Building your first report in Power BI - Tutorial
Okay, so you have downloaded Power BI and eager to play with it. Here is a step by step tutorial to help you.
We will use sample employee data for this process. Click on below button to download it.
#1 - Understanding Power BI Desktop UI
Open Power BI Desktop application. After you exit the welcome splash screen, you will see the blank Power BI application. Let’s understand this screen. Here is an illustration explaining 11 important features / buttons in Power BI Desktop.
11 Important features of Power BI Desktop UI
- Ribbon. Find most important and regular stuff in Home ribbon. Navigate to other ribbons for specific functionality.
- Get Data. Use this button to get data from almost anywhere – Excel files, websites, databases, APIs etc.
- View selection, by default you will be on Report view. Change to data or model view to see behind scenes.
- Fields Access the tables and fields (columns) of your data here. Use them in visuals (5) or filters (7) etc.
- Visualizations add charts, tables, maps, filters etc to the report from here.
- Visual Fields, Format and analytics use this area to set up and customize your visualizations (charts etc.) Note the paint-roller, use it to edit colors, fonts, settings etc.
- Filters – set up chart, page, report level filters here. Anything you restrict will be removed from all the linked items.
- Canvas this is where you construct your reports.
- Save your Power BI reports by pressing CTRL+S or clicking on this button. They will be saved as PBIX files.
- Publish the reports with this. You can publish them to online (either free PowerBI.com account or paid plans) so that others can access your reports.
- Add more pages to your report using the + button.
#2 - Load data into Power BI
#3 - Adding Visuals
Working in Power BI feels like playing with your data. This is because of the drag-and-drop nature of report building process. To add a visual,
- Click on the type of visual you want.
- A blank visual will be added to available empty space on your report canvas.
- Select fields from your data and add them to relevant places.
- Axis
- Values
- optionally legend
See this demo to understand the process.
How Power BI visualizations are different...
- Power BI visualizations are always interactive
- They are sorted by default (for ex: descending order for column charts)
- Value field will be the number of chart. You can change the calculation to SUM / COUNT / AVERAGE etc.
- You can even use DAX Measures in the value area of charts
- All visualizations support extra tool-tips (both simple and report-page type tooltips)
- Use Legend field (where available) to see 2nd level detail.
- When you add multiple fields to axis, Power BI adds drill-down buttons to see chart at various levels
#4 - Changing Calculations for the Visuals
You can use two methods to change the calculations for the charts.
- Use default options for calculations – SUM / COUNT / AVERAGE etc.
- Write your own calculations with Power Pivot measures
To change the calculation of a chart with default options, follow below steps.
- Select the power BI visual
- Go to Value field.
- Click on the little down arrow symbol.
- Select the type of calculation you want.
- Done.
Here is a quick demo of changing chart calculations in Power BI. It shows how to change the chart from SUM of salary to AVERAGE of salary.
#5 - Understanding Power BI Interactions
Power BI visuals are interactive. This means, if you have more than one chart on a report page, when you click on a particular item on a chart, all other charts respond to the selection and change.
This is quite different from normal Excel charts, but once you get used to it, you will see the true power of Power BI visualizations.
Here is a quick demonstration of Power BI visual interactions.
Power BI interactions - FAQs
Here are some of the common questions you may have about Power BI report interactions.
Are all visuals interactive?
By default, all visualizations in Power BI report are interactive. The only exception is card visuals. They are not interactive. So if you click on them, nothing happens to other charts.
How to unselect ?
Simple, click or touch the selected item again. The interaction will be gone.
How to disable or change interactions?
Select any visual, go to Format ribbon. Now click on “Edit interactions” button. This will show interaction buttons on top of all your visuals. Click on do not interact button (looks like no entry sign 🚫).
You need to do this for each visual.
I want to filter instead of highlight on interaction…
You can use the “Edit interactions” button to change the style of interaction. There are three possible interactions (as depicted to the right). 
- Filter
- Highlight
- No interaction (no entry sign – 🚫)
#6 - Putting it all together - Making a sample report in Power BI
Now that you have some understanding of Power BI, let’s create our first Power BI report. The focus of this report will be,
- For a specific manager
- Show staff distribution by department
- Gender break-down
- All of their staff by salary and rating
This is a fairly simple report, but it does demonstrate the power, elegance and ease of working with Power BI.
Here is the final output we will create.
Step by step instructions for our first Power BI report:
- Load the employee data into Power BI. (here is the file).
- Add a column chart.
- Department on axis
- Name (count of name) in values area
- Add pie chart
- Gender as Legend
- Name (count of name) in values area
- Add a table with name, age, rating and salary fields
- Add a slicer with manager as field
Our report is almost ready.
Adding conditional formatting
Background colors on rating field:
Select the table. Click on down arrow symbol next to Rating and apply conditional formatting > Background color. Set up a color scale as shown below.

Data bar for Salary:
Click on conditional formatting for salary, set up data bars as shown below.

Adding title for the report
From Home ribbon in Power BI, click on Text box and type your report title in that. Format the text and position it on the top.
That is all, your first Power BI report is ready.
Play with slicer or charts to see powerful insights from this report.
#7 - Saving & Publishing your Report
To save your Power BI report, press CTRL+S. This will save a copy of your report on your computer. Power BI files use the .PBIX as extension.
How to share / publish your reports?
You can publish your reports in various methods.
- Email or share the file: this is the simplest method. Just email or share the file with your audience. They will need Power BI Desktop to view the reports though. Also, they will need to access the source data sets to be able to refresh or update the reports.
- Publish to Power BI online: This is the recommended way to sharing your reports. But you do need PowerBI account (either paid or free) to be able to publish the files to online workspace. Once you publish your reports to the workspace, you can invite others to view them or pin parts of it to a dashboard etc.
- Share to Mobile / Tablet via Power BI app: Once you publish the reports to Power BI workspace, others can view the reports on web or on mobile / tablet apps by accessing the workspace.
#8 - Updating & Refreshing your Report
With Power BI, you create once, use forever. As your business data changes, all you need to do is, refresh the report. This will automatically fetch any new data from your source, update all calculations and visuals. If you publish the report again, this will replace the online version with new one so your colleagues or clients can access updated reports easily.
What if your data format changes?
For example, if you add new columns or rename things, then you may need to rebuild some visuals or calculations. You will notice any broken items upon refresh and you can easily fix them.
When to use each of the Power BI visualizations?
As of November 2019, Power BI has got 34 default visualizations. You can also install any of the 100s of custom visualizations from Power BI marketplace. All of this can be overwhelming. So I made this handy illustration and check-list to help you decide the right visualization for any situation.
Picking right visualization for your situations...
Compare one with another
- 2 items to compare: Use two cards or KPI visualization.
- Up to 12 items: use column or bar charts
- More than 12 items: Use tables with conditional formatting. Try column / bar charts with Top N filter if you want to see top few items.
Trends, changes over time
Use line charts or area charts with time on x axis with oldest time to left.
If you have just two points in time and want to compare the changes, consider the waterfall chart.
You can also toy with ribbon chart to see if that provides any valuable insights.
Composition, how things add-up?
Use 100% stacked bar / column charts, area charts.
When you have few values to see the composition, use pie chart or donut chart.
As Power BI is interactive, you can getaway with having too many (but definitely not 100s) of slices in your pie / donut charts.
When you have lots of values with few clear outliers, try the tree-map visualization.
Spacial distribution
Use Maps for geographical distribution of data.
- Bubble map: when you have data about specific locations
- Filled map: when you have data for regions
- ESRI maps: for maps with additional reference layers (say population, crime rate, GDP etc.)
For distribution by floor / store shelves or something else, use shape maps.
Distribution
For one-dimensional distribution, use line or area charts
For two-dimensions, use scatter plot
More than two-dimensions, you may want to avoid the visualizations altogether as they can be quite hard to explore. If you must, try a table.
Outliers, what is different?
Use column, bar or table charts with conditional formatting to bring out the differences.
You can also try the key influencer visualization to let Power BI analyze your data and tell you what is the most significant item impacting outputs.
Simple numbers, messages and indicators
Use card visualizations or KPI visualization.
Video Tutorial - Getting Started with Power BI
Here is a complete tutorial on how to start from zero and create a report with Power BI. Please watch it to learn what Power BI is, how various components of the technology (Power Query, Power Pivot and Visualizations) relate to each other and how to work with the software for the first time.
Download the Getting Started Files
Power BI - Glossary
Power BI is a new and rapidly evolving technology. There are a lot of technical terms you will hear as you start using Power BI more. Here is my list of top 10 Power BI glossary.
Power Query
Power Query is the data processing engine for Power BI. Whenever you connect to a data source using “Get Data” button, you are using Power Query. This engine runs in the background to,
- connect to data sources
- gather data
- change / pre-process data based on rules
- combine multiple datasets to form one table (joins, appends)
- publish finished datasets to Power BI for analytics and visualization.
You can use Power Query in Power BI or in Excel too.
Here is introduction to Power Query.
Power Pivot
Power Pivot is a calculation engine for Power BI. You can use Power Pivot to model complex data, set up relationships between tables, calculate things to be show in value field area of tables or visuals.
Think of Power Pivot as a calculation layer between your data and outputs. You can tell Power Pivot how you want your calculations done thru a language called as DAX and Power Pivot can give the answers. It is an extremely fast & scalable software.
We can use Power Pivot in either Excel or Power BI.
Here are some links about Power Pivot. They explain it from Excel perspective, but the idea is same.
DAX
DAX stands for Data Analysis eXpressions. This is a language for calculating things with Power Pivot.
DAX expressions or formulas look almost like Excel formulas.
Example DAX formula:
Total Salary: =SUM(Table1[Salary])
Sums up Salary column in the Table1 and presents it wherever you use this [Total Salary] measure.
M Language
Note: the link to Gil’s book uses my Amazon affiliate code.
Relationships
You can link two tables based on a column. This is called relationship.
For example,
Say have two tables – Sales & Customers.
You can link Sales table and customer table based on Customer ID. We then say Sales & Customer tables are related.
It means, both columns have the same meaning.
There are two kinds of relationships.
- One to many relationships: a value in one table is linked to one or more values in another table. Example: Customers to Sales relationship. Each customer appears once in Customers table but can have many matching transactions in Sales table.
- Many to many relationships: Each value in one table can be linked to one more more values in other table and vice-a-versa. For example: People and Projects. Each person can be part of any number of projects. Each project can have one or more persons.
Measures
Measure or calculations are what gets displayed in visuals / tables / cards.
The Count of Name, Average Salary things we used earlier are measures.
There are three kinds of measures in Power BI.
- Implicit measures: These are automatically created when you drop a filed in the “Value” area of a chart / visual. Example: Count of Name.
- Explicit measures: These are the ones you create by using DAX language. Example: =SUM(Table1[Salary])
- Quick measures: These are same as ‘explicit measures’ but instead of typing the DAX formula, you use Power BI quick measure feature to make them.
You can create measures by right clicking on a table (area 4 in the Power BI Desktop UI) or clicking on the “New Measure” button on the ribbon.
Data model
Imaging a big black box with all your tables and any relationships between them along with the measures you have defined. This black box is your data model.
Other common names for data model are Cube, tabular model or simply model.

Interactions
Interactions refer to the clicks and selections you make on the report to see data relevant for selection.
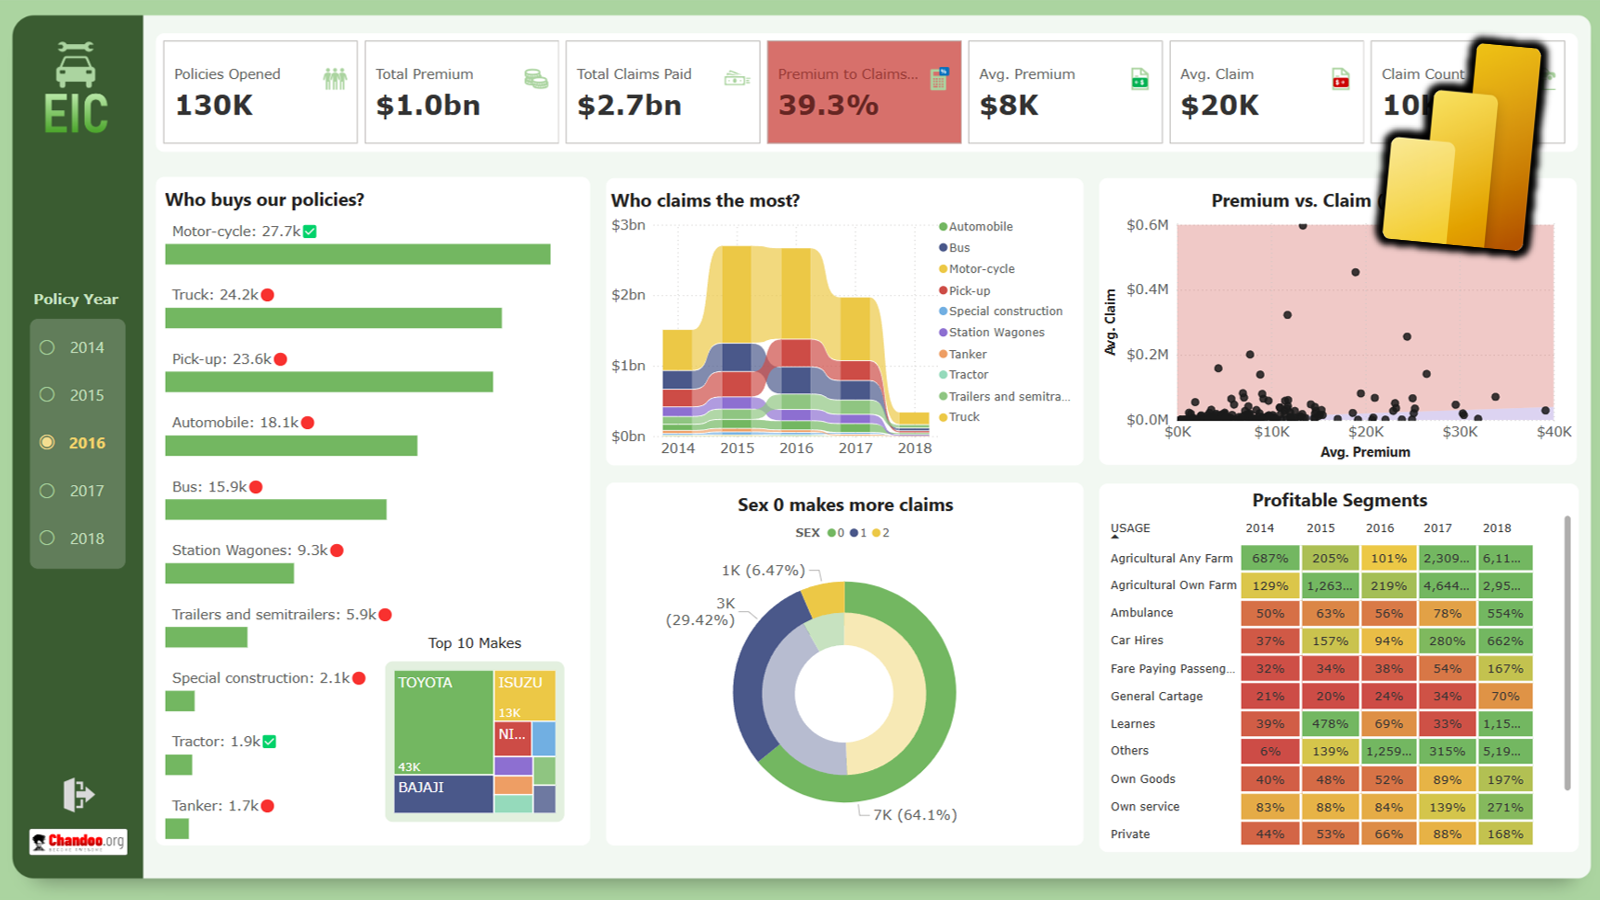
Here is a quick demo of Power BI interactions.

Filters & Slicers
While interactions allow you to peak at data for a point, Slicers & Filters allow you to restrict an entire report or visual(s) to use only some part of your data.
Power BI offers various levels of filtering.
- Slicers: These are on-page filters. By default they interact with every visual on the page and update them whenever you change something. For example: Manager slicer in our Power BI report from above.
- Visual level filter: This is a filter set on a specific visual. It will not impact other visuals on the page.
- Page level filter: This will act on all the visuals on a page and restricts the data that is sent to them for calculation.
- Report level filter: This will impact all pages in a Power BI report.
Only slicers can be added to a report page. Other filters are set in “Filter Pane”.
Refresh
Refresh refers to the concept of updating all the data, calculations and visuals based on source data changes. You can manually trigger refresh by clicking on the “Refresh” button in Power BI Desktop Home ribbon.
You can also schedule refresh for online published reports so that every day (or whatever frequency you determine) Power BI online will refreshes your data and updates the published reports.
How to learn Power BI - Resources
Here are my top recommendations for learning Power BI.

Power BI Websites
My top go-to Power BI websites are,
- Microsoft Power BI blog for new updates, announcements, tips and ideas.
- Matt Allington’s blog to polish my Power Pivot skills
- Radacad by Reza Rad for amazing case studies and ideas on Power BI, Azure ML etc.
- Enterprise DNA
- Kasper on BI
- Ken Puls for Power Query to get advanced skills in PQ
- Rob Collie for Power Pivot
- Crossjoin by Chris Webb

Books on Power BI
- Mastering Power BI by Brett Powell
- Supercharge Power BI with Power Pivot by Matt Allington
- Collect, combine and Transform Data with Power Query by Gil Raviv
- Power Pivot and Power BI by Rob Collie and Avi Singh
Note: All these are Amazon affiliate links. I recommend these books because I find them immensely helpful.

Power BI Video Channels
The quickest and most fun way to learn Power BI is by watching videos. I subscribe to a handful of channels to stay on top of Power BI developments, news, tips and ideas.
- Microsoft Power BI official channel: this is the pace to go for monthly update news, community webinars and more.
- Guy in a cube: for videos on Power BI tricks, interviews and more
- Curbal: for interesting tricks, DAX and more
- My own channel: If you haven’t already subscribed to it. For all things Excel and Power BI.

Power BI Courses
Power BI is vast, technical and often confusing. If you are finding the journey too hard, consider an online course.
I recommend my own online class – Power BI Play Date. Next round of enrollments begin in late November.
Latest Power BI, PQ and PP Articles on Chandoo.org

FIFA 2022 World Cup Schedule & Results – Excel [FREE Download]
It is the Soccer WORLD CUP time. Let’s celebrate the season with an AWESOME Excel File to track game schedules, results & scores.

How to extract common values in two tables? – Power Query Tip
We, humans like to compare. Whether we are on Facebook or workbook, we want to compare. So how do you compare two tables and extract common values? Simple, use Excel Power Query. It can merge (a la join) tables and give you the common values.

How to make a variance chart in Power BI? [Easy & Clean]
Power BI is great for visualizing and interacting with your data. In this article, let me share a technique for creating variance chart in Power BI. Variance charts are perfect for visualizing performance by comparing Plan vs. Actual or Budget vs. Actual data.

Top 5 with above average – Power Pivot Trick
Welcome to Power Mondays. Every Monday, learn all about Power BI, Power Query & Power Pivot in full length examples, videos or tips. In this installment, learn how to get top 5 list with a twist.
Let’s say you are analyzing sales data and you want to know who are your top 5 sales persons?
Of course, this is simple, you just create a pivot to see total sales by person and then sort the pivot. First five rows have the answer you need. You can even apply a value filter > top 5 to show only their data.

Job Title Matching Problem [Excel Homework]
Howdy folks. Almost the end of August here. Let’s wrap it up with a nice little challenge, inspired from my recent consulting gig. Say you are looking at few job titles that look similar and want to match them to correct title.
Extract currency amounts from text – Power Query Tutorial
Let’s say you got some text values and want to extract the amounts from them. Something like above.
How to go about it?
We could use a variety of techniques to extract the values.
- Formulas – not easy given the unstructured nature of data. But almost possible. See this for an example.
- VBA – possible, read this forum discussion few ways to do it.
- Power Query – at first glance it might seem tricky, but PQ makes this all too easy. Read on.

Extract data from PDF to Excel – Step by Step Tutorial
Recently I had to extract data from multiple credit card statements and combine them to one Excel table. In this tutorial, let me share you simple steps to deal with PDF data and extracting it to Excel.
Closing Remarks on Power BI
Power BI is one of the most fun and elegant ways to work on complex data sets for analytics or reporting needs. I encourage you to learn it so that you can ahead in your work. It is both deceptively simple and inherently complex software. That means, just like Excel, almost anyone can pick up Power BI and start building things immediately. But if you know which buttons to press and what formulas to write, you can unravel a marvelous world of data analytics with Power BI.
I wish you all the best in this journey. 👍


36 Responses to “Visualizing Financial Metrics – 30 Alternatives”
Although I am one of the contestants, I must wholeheartedly admit that the Dashboard of Chandeep is the best of all. It's design, colors, message-conveying is the greatest. My regards!
I would like to learn how Chandeep highlighted the graph when he made a selection on the slicer.
Any links to previous posts perhaps where this was covered by Chandoo?
Thank You
Ahmad
Dashboard from Abhay simply rocks. To the point and conveys the intended message even for a novice.
Infographic by Pinank - is looking good
I have also contributed to this contest. I am really inspired by various entries in above post. Based on following parameters i would like to rate these:
1. Explanatory - Whether dashboard will be used to explain certain thing or mention a story. This type of dashboard will be static.
2. Exploratory - Here user would like to interact more with the dashboard to extract the relevant story or meaning which is not apparent. Hence, this type dashboard needs to have more interactivity.
3. Scalability - If new or more data can be added to dashboard and still the functionality will work. If user wants to add more companies, years, etc. will it work.
Based on above criteria I would rate following entries as top ones:
1. Explanatory - by Pinank
2. Exploratory - by Chandeep
3. Scalability - In most of the entries additional work would be required to include more data except for mine. new years or companies can be easily added and analysed in chart by me.
These entries are really inspiring i will definitely use it to revise my dashboard.
Abhay's dashboard is good however, if Chandeep can go with the trend analysis Abhay has done (line graphs), then maybe Chandeep's dashboard can excel.
And now I'm angry that I haven't noticed contest announcement earlier and I've sent what I've sent... Building a dashoboard was supposed to be my goal but lack of time forced me to sent sth simplier and now I can see how big mistake it was (when it comes to fighting a competition like this). Nice work guys! It's realy inspiring! Even less advanced works are intresting because of different task approach. So wance again: thanks 🙂
If I had to choose the best ones (IMHO) I would go for William and Edouard as a second place (for both). Despite some weak sides (like label errors or "work place" next to a final chart) they meet my sense of clear data visualisation and contain intresting interactive elements.
The best entry is definitly Chandeep's. Although there was some failing with automatical comenting feature (#arg! in my Excel'10) it's full of advanced dashboarding tricks which makes it easy to read. Furthermore, as one of the few he finished(?) his project - it opens in a "secured mode", with no place to mess anything, no data trash - just choose, point and read/print.
It all deserves to get the Grand Prize!
and BTW: when can we expect another contest? 🙂
Big round of applause to everyone who participated. I'm amazed at the creativity of our community. 🙂
My vote would be for Chandeep, MF Wong, and Miguel.
I have not contributed, but have read this post with a lot of interest. I would like to congratulate all participants for there work & inventiveness.
My #1 spot goes to Gerald for showing all the data in 1 graph & to have still kept it simple & readable.
I would give a prize for innovation to Pinank for the use of icons.
Great to see so much creativity.
I have not contributed also, but have wait his post for a long time (because I have the same kind of issue in my "daily life").
My top 3 is the following :
- Pinank for the effeiciency and for the style
- Arnaud for the calculation behind the chart
- Miguel for the elegant business oriented dashboard
All the entries look very good. However I feel Pinanks entry seems the best as it is very explanatory with good innovative thoughts.
Hi all,
Some brilliant dashboard and interactive entries - really nice stuff and lots of clever tricks.
However, given that the initial question was "Need to quickly visualize 3 variables ( Company, years, Financials) in a single […] chart", unfortunately I don't think any dashboards - as cool as they are - really answer that question. The interactives also assume that this will be opened in Excel rather than seen in a printed hand-out, which essentially means you'd need multiple charts to show all the variables or be limited to a computer screen. Even Chandoo's initial panel chart approach - which is static, and also very simple and clean - is not really a 'single chart'. Furthermore, most of the interactives don't actually show all variables at once but rather slice the data into more manageable chunks, which is not staying true to the original brief.
So, in light of the above, I'd vote for Gerald in first place, Edwin in second and finally my third chart option in third place (yes, I know, voting for yourself is poor form but unfortunately I think the original question disqualifies most of the entries).
Anyway, a fun competition and thanks for following up on this Chandoo.
I am once again in awe of the submittals to a Chandoo contest. The results are so impressive. I have been trying to build nice dashboards for years and take so many courses, but I don't seem to have the eye for design. The color choices, fonts and chart choices are so important and I'm amazed at how some people really have a great talent for making the best selections.
It's nice to have such quality inspiration!
I saw Chandeep's entry on his website and I must say that I was very impressed by it. Simply loved it. Somewhat makes it difficult to keep an open mind towards the other entries.
My ranking:
1. Chandeep for its completeness as dashboard.
2. MF Wong/Miguel for "simple" but smart graphs.
3. Pinank's entry looks like a page from a glossy magazine.
During scrolling I stopped at Chirayu's entry: easy to the eye.
But honestly congrats too all for having the balls to participate and thank you for sharing your creativity!! Hat's off to you.
Miguel, MF Wong, and Pinank.
Thanks to Chandoo and everyone who contributed for the great ideas.
Hi,
I personally liked the dashboard of:
1. Chandeep - His dashboard is clear, crisp and informative, his color combination and design is awesome, also he has shared few details like operating leverage plus he has added few comments. In totality, its a complete packaged dashboard.
2. Miguel - His dashboard is simple and all the information is visible in one shot.
It's very interesting looking through these - you can definitely tell who's done courses in dashboard design and with whom!
I particularly liked Pawels 'sperm chart' 😉 ... squint your eyes - you'll see what I mean). each of the charts or dashboards are put together well - but I agree with Elchin on this one - Chandeeps dashboard set 'tells a story' of the data. Student of Mr Few??
Without a doubt, Chandeep deserves #1. #2 goes to Abhay, and #3 to Pinhank, for the great presentation style if nothing else.
MF Wong
Do not apologize for any delay! Moving from one town to the next only 10 miles away is tough enough - let alone a family moving from one country to another!
THANK YOU for this excellent post!
As one of the participants, I have been looking forward to this post for long. But totally understood the reason of delay, so never mind! Hope all is well in NZ.
Thank you very much to those who like my chart! 🙂
Also thanks Chandoo for suggesting a name for it "Container Chart", which I have never thought about.
Personally I like the infographic by Pinank. Very outstanding design and use of icons. My two-cent worth: Just the lower part of "Yearly Trend" is actually good enough to answer the question, isn't it? 😉
Cheers,
What an outburst of creativity!
Vote for Chandeep and Pinank!
Agreed!
Awesome dashboards
Infographic by Pinank is awesome
Thank you so much for sharing!! i learn so much from these posts
Highly appreciated
Ahmad
South Africa
Fantastic responses from all the contestants. Some really great ideas. I'm inspired and will adapt some of these to my own dashboard work. Thanks for hosting such a great contest!!
Thank you for sharing this valuable resources !!!
I have only a couple of question that wasn't able to solve regarding data-origin.
Nowadays I have the data coming from a "current" situation from a big database containing all kind purchase-orders information of many different projects. I can calculate the current status of each project investments, but I am not able to track automatically the progress of it month to month or week to week by freezing the calculated metrics on each date. This would let me calculate new graphs and the speed of investments execution.
My question would be, if it is possible to calculate something with an excel formula and automatically freeze this values in a new row or new column. I guess that right now, Basic is the only way, but I guess that there could be a function to copy-a-range, insert-range-as-value-only as a new row or a new column or display everything down or left.
This would preserve the excel formulas defined, and add new data, everytime that it is re-calculated.
Any idea?
Great post , loved all chart representation. Congratulations to all participants and winners.
I need updates to this article.
I didn't even realize this got posted. Came across it today. Thanks
Fantastic post but I was wondering if you could write
a litte more on this subject? I'd be very thankful if you could elaborate a
little bit further. Thank you!
Hi Chandoo,
I comeback after a long time on your Blog. So I saw it lately. Its a brilliant idea.
I like all entries and these are amazing efforts from all participants.
Regards
The report presented by Pinanik is excellent and very innovative. Could be an interesting work for portfolio presentation