• Hi All

    Please note that at the Chandoo.org Forums there is Zero Tolerance to Spam

    Post Spam and you Will Be Deleted as a User

    Hui...

  • When starting a new post, to receive a quicker and more targeted answer, Please include a sample file in the initial post.

Copying formatting to all pages in a sheet

JillStraton

New Member
Hello all,
I have a page that inspectors fill out. When they get to row 30 I want the next row to be formatted exactly like the first 30. I however want the second page to be fully formatted whether I add content to every line on the second page or not.

See the attachments. excelpg1 is how it looks on first page, excelpg2 is what happens on subsequent pages.

I really need help with this ASAP. Your help will be MOST DEFINITELY appreciated.
 

Attachments

  • excelpg1.PNG
    excelpg1.PNG
    21 KB · Views: 46
  • excelpg2.PNG
    excelpg2.PNG
    23.2 KB · Views: 42
This *might* work. Right-click on sheet tab, view code, paste this in.
Code:
Private Sub Worksheet_Change(ByVal Target As Range)
Dim headerRows As Integer
Dim numRows As Double
Dim breakRow As Double
Dim newRow As String


'How many rows are in the header section,
'that repeat on every page?
headerRows = 5

'How many normal lines get displayed per page?
numRows = 44


With ActiveSheet

    breakRow = Cells.SpecialCells(xlCellTypeLastCell).Row
    newRow = "$A$1:$D$" & WorksheetFunction.Ceiling(breakRow - headerRows, numRows) + headerRows
   
    If newRow <> .PageSetup.PrintArea Then
        .PageSetup.PrintArea = newRow
    End If
End With
End Sub

You will need to adjust the two variables that I commented as appropriate. Basically, the macro will try to adjust the print area to fit what you need if you start to go into another page.
 
@JillStraton,

I generally try to avoid merging cells whenever possible. When it is needed I try to keep it away from the main data area. I have taken a stab at a revised structure for the worksheets and some conditional formatting that may help you get started in the right direction.

It is certainly not complete, but it does add the borders using conditional formatting in blocks of 24 rows (based on the page size I ended up with). My version doesn't have signature and check boxes that are currently at the bottom of your page, but I think you could move them to the top and include them in the rows that repeat on each page.

If you enter something in cell A31, you will see the borders appear for that page. However, they don't show up in print preview. I did not test print to see if they print.

I hope that helps at least some.

Regards,
Ken
 

Attachments

What I need to have happen is the row column area of the form to repeat the formatting so that we can add lines and then pickup the existing formatting
 
Hi Ken, First thank you for answering. Next it seems to work well when adding into A31 - it added 23 lines. Now at line A54 when I add text it doesn't add lines.
Also where is the code being executed from. Right click on sheet tab view code don't see. No macro.. is it magic and unicorns??? I hope so.. :)
 
I am using conditional formatting. There is conditional formatting button on the "Home" tab of the ribbon. If you select manage rules and select "This Worksheet" from the drop list; from there you can see the formula that controls the borders. It is set up based on the 24 rows that fit on the sheet and subtracting 7 (i.e., the first row after the headings). In order to get the borders for the next page, you should enter a value into column a of the first row without borders (so A55 instead of A54).

Ken
 
This looks really great. I'm going to keep the "body" area NO MERGE and just merge the cells in the customer info box. I think I love you Ken!;)
 
Hi Ken, look at the attached. This is what I'd like to go into production, however there is a issue with printing. Look at the actual file and then look at the print preview, it only prints up to row 30? Thanks Ken
 

Attachments

Hi Jill ,

In case the time difference delays Ken's response , I'll explain what you can do to resolve this problem yourself.

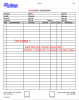
First , put the formula which you have used in the CF outside in a worksheet cell ; since your print area starts from row 7 ( I assume rows 1 through 6 form the header ) , put in I7 , and copy it down.

If you go into the Normal View or the Page Break View , you can see where the page breaks are ; in your file , the first page break is after row 41 , which means rows 7 through 41 form part of page 1. This is 35 rows.

This means that starting from row 7 , every 35 rows will form a page of the printout , provided there is content on that page in column A ; for example , if page 1 has to print , there should be some content in cell A7 ; if page 2 has to print , there has to be some content in cell A42 , and so on.

Thus , we need to refer to cells A7 , A42 , A77 ,....

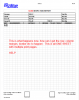
If you put the CF formula in I7 , and copy it downwards till say I 200 , it may initially show FALSE everywhere ; now when you enter something in A7 , it may or may not change to TRUE ; keep changing the values of the numbers in the formula till you get what you want. I did this , and came up with the following formula :

=INDIRECT("$A$" & (ROW()-MOD(ROW()-7,35)))<>""

If you select your entire data range , say A7 through G200 , and apply the above formula as CF , and remove the borders you have already put in place as fixed borders , then when you enter data in A7 , you will get the first page with borders ; when you enter something in A42 , the second page will get its borders , and when you enter something in A77 , the third page will come with its borders , and so on.

However , please note that since the page breaks are not based on the number of rows but on the physical size of the page , and the margins , you need to keep the row height constant throughout your print area ; if the rows are of different heights , each page will have a different number of rows.

Narayan
 
Jill, it looks like the rows were being limited by the print area. I have attached a modified version that sets the print area to include all of columns A:G. I have also changed the formula based on the page size that showed on my preview (for 8.5"x 11" paper).

There is still another issue with the borders only printing as far down as there is data for the pages with conditional formatting. That is a problem if you want the extra blank lines to print beyond the first page. If you only need borders where there is data, then the conditional formatting could be set to handle that for all pages (making page 1 the same).

Ken
 

Attachments

Back
Top